
The Most Bang! For your $Buck
- Dec 21, 2025
- 12 min read
Updated: Dec 21, 2025
At the risk of stating the bleeding obvious, renovations cost a lot of money. But some renos cost waaaaaaay more than others. What’s more, it is so common for them to go well over budget it’s almost a joke.
Except that spending money you don’t really have isn’t a joke.
I’m a bit of a tight arse (let’s be honest!), and when I renovated my own place, I had a limited budget to play with. Knowing where to spend up and where to be frugal was really important for me. I didn’t want to over-capitalise (ie: spend more money than I’d ever see a return on or get equal enjoyment from).
I’m here to share the insights I gained with you, so you can also save money.
But first, this all assumes you’re project managing your own renovation – whether you’re hiring trades or attempting D-I-Y – and have some level of control over material choices and purchases. If not, say good-bye to your hard-earned cash. Just another reason why I prefer to take the reins.
My Experience: Throughout this blog I’ll provide info about my own experiences for each topic when renovating my own home.
But here are the Stats you’re dying to know:
One bedroom unit incl. living room, kitchen, bathroom, foyer and balcony (6 ‘rooms’ cosmetic renovation – not structural)
Mostly D-I-Y and took approx. one year including prep work through to staging/interior design
Estimated cost if I’d hired a renovation company: $40k in 2020 money (and probably a month max)
Maximum Cash to Splash: $20,000
Budget: It changed throughout the renovation as costs became clearer, but I aimed to spend about $15,000 plus my own labour
Total expenditure: Including trades, materials, tools, consumables, staging items and delivery fees: ~$13,000 - coming in UNDER budget by around 15%!!
Approximate Value Added: ~$50,000
1. The Biggest Two Things You Need to Save Money
1. Time! They say that in life we have either time or money. If you want to snatch up bargains, you’ll need time to shop around (either online or in person) and the patience to wait for what you want. I recommend starting the process early, and acquire things as you come across them.
2. Storage space. All this stuff you acquire takes up loads of space, so you’ll need to find a place to store it. You could pay for storage (starts at around $120/month) but work out whether that’ll actually lead to long term savings. Remember it’s not just the materials, but also all your tools and consumables (screws, caulk etc).
Where possible, order and pay for things, but arrange delivery/collection just in time – when you’re actually ready to install. It’s not always possible, but better to use their storage space if you can!
My Experience: The renovation took me over a year, and I started buying materials about 3 months before I picked up a tool. Of my ~900 hours renovating, at least 1/3 or more was devoted to sourcing materials. I stored stuff on-site in the property, plus I had access to two storage rooms. There was a lot of moving stuff around, and while living in the property, it did get very tedious!
2. Tools
If you D-I-Y, having the right tools for the job will exponentially increase your chances of success. But tools and their accessories are really expensive. I recommend to buy only what you really need and will get great use out of. Here are some key tips:
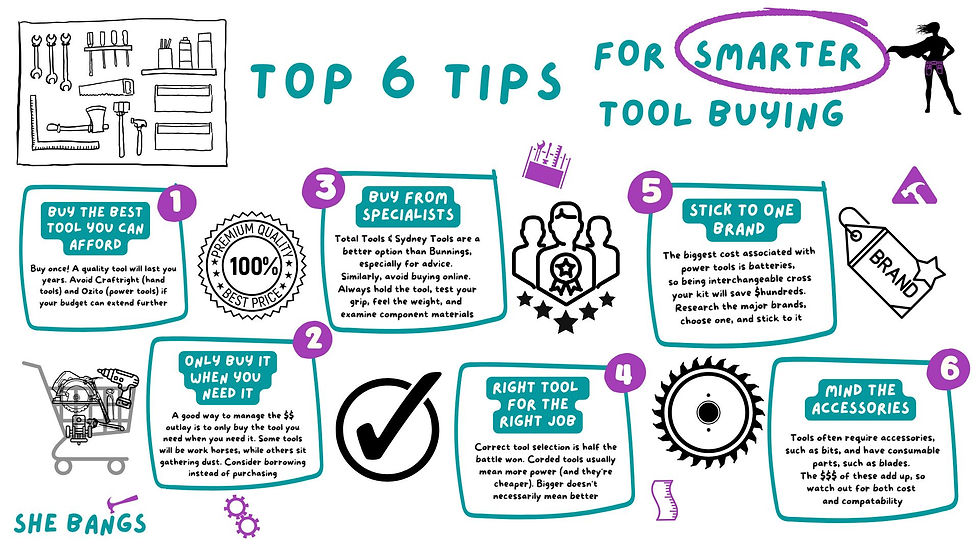
Buy the best quality you can afford. Ozito is rubbish. It’ll probably break the second time you use it! Ryobi is a decent D-I-Yer brand, but if you can spend a little more, do. Remember that you can always resell them, but there’s no market for low-quality tools!
Choose one brand and stick to it. This is especially true if you’re using cordless because the batteries are super expensive and you want to be able to interchange them between tools. This also allows you to buy ‘skin’ only (ie: the tool without battery), which saves money.
Corded tools will be much cheaper, and generally have better overall performance, especially for heavy applications like sawing and masonry drilling.
Buy second-hand tools, but do be aware there is a significant black market in stolen goods. There is also a small risk the tool isn’t functioning as it should (eg: blades that don’t lock in place properly), which can be dangerous.
Borrow!! There are Tool Share Libraries around, neighbours, friends, D-I-Y communities and even a local ‘Shed’ where you can loan or use tools. People can be funny about loaning tools (especially power tools), but some folks are quite happy to loan something collecting dust. Also, use commercial services to loan bigger items. Bunnings offers a decent range of loan items (but not always in good condition), but Kennards and Coates are two major hire shops.
What tools to get?
It does depend on what work you’re doing, but these are some of the key tools you’ll probably want to have at the ready:

My Experience: I went with Makita after a lot of research, which is a great mid-range brand that many professionals use (especially carpenters). I bought from a few places, including Total Tools, and managed to score great deals on combo kits and redemption offers – again, I spent the time shopping around and patiently waited for sale periods. Because I was starting a handywoman business, buying tools was an investment, and I spent around $2000 on tools alone (and much, much more since!), including hand and power tools, replacement blades etc in addition to the tools I already owned. I hired a 600mm tile cutter, and I loaned a circular saw and drop saw.
3. Where to Shop
Around! Shop around! If you want to save money, you need to resist the urge to just go to big retailers like Bunnings and Ikea. They’re convenient, and sometimes they have good pricing, but don’t be fooled into thinking they’re the cheapest option for the quality of item.
There are loads of distributors which sell direct to the public which are a fantastic option. They often have leftovers and seconds, which is perfect when you only need a fairly small quantity. You’ll save a TONNE!!
Specialist retailers like Reece Plumbing, Beacon Lighting etc are good for advice. They’re not actually plumbers or electricians, but usually the staff do have good knowledge, and they’re happy to assist, even if you don’t buy anything much.
Other small businesses, such as timber yards and tile shops, are always experts in their field, and offer a high level of service and usually decent prices.
Be careful about buying online, especially from international sites. The product quality may be low (or even dangerous), they may not meet Australian Standards (a legal minimum), or returns & exchanges may be difficult.
My Experience: While I did shop loads at Bunnings and Reece, I also got a lot of materials from Western Distributors, Urban Salvage, and Keables.
My top tip when shopping, especially retail, is that many places have very liberal returns policies. Just keep your receipts and buy anything you think you’ll need. It saves you a second/third trip, you can ‘try out’ something to see if it’ll work or look right, and you can simply take it back if not. Also, price escalations are common so if you see it and go back a few months later, the price may be higher! Plus, be careful because Bunnings have different prices at different locations – truly!
My Experience: I legitimately made around 30 returns of items! 24 of them were to Bunnings, and the others were to Ikea and Spotlight.
The BEST Place to Shop
Online! I don’t mean Amazon and EBay. I am talking about Facebook Marketplace, local groups and renovation forums, Gumtree, and the like. People accidentally over-buy, do clear outs of the garage, do demolitions etc. Their trash is definitely your treasure! You can pick up so much stuff for free or very reasonably priced, from tiles to taps to full kitchens!
The upside, apart from saving money, is think of the sustainability brownie points (and bragging rights) you’ll earn!
The downside is coordinating it all and travelling to collect, plus not being able to return it. But you can save literally thousands of dollars if you have the time to trawl through regularly to see what’s available.
My Experience: After Bunnings, I spent the most buying from other people online (and at a garage sale), not to mention all the free stuff! I got the perfect light fittings, a rainhead shower at a third of the price, a near new oven still under warranty, a fancy unused vanity basin for a bargain price, some beautiful feature tiles….and best of all, the timber for my kitchen bench top PLUS extra pieces for 5 shelves from someone else’s house!
4. Trade Discounts
A lot of the larger retailers of building supplies and tools offer pretty liberal ‘trade’ programs. All you need is an ABN and you can apply to get discounts. For example, Bunnings has PowerPass which offers a 5% discount on many items. It’s not earth shattering, but you’ve also got literally nothing to lose.
You can also ask your plumber and electrician to buy items on their trade account at specialist stores. Not everyone will agree, but many will. You get the discount, they get loyalty rewards.
My Experience: I spent over $4000 in Bunnings, so even with just a 5% discount, I saved around $250.
5. What to Renovate
Or what not to renovate. This question will probably be the biggest factor in saving heaps or spending big.
Really it comes down to why you’re renovating. Is it to improve the liveability for your family? To sell? To rent out short or long term? These reasons will require a different level of investment, and therefore will guide you with what work to do, and what to leave as is.
Make an assessment of needs versus wants, must-haves versus nice-to-haves, and good enough versus get-it-out!
Then STICK TO THE SCOPE!!
Once you start (and even during the research phase), it’s super easy to get distracted by all the things you could do. Making a plan and sticking to it as much as possible (allowing for ‘reno surprises’) is genuinely one of the most sound cost saving initiatives you can rely on.
The Different Types of Renovations
Cosmetic renovations are obviously lower cost. They improve the appearance and functionality of the space, without impacting the actual layout. But even within ‘cosmetic’ updates, there is variability.
Are you moving plumbing services, adding lighting (or need to upgrade to modern standards)? If you rip out the kitchen cabinets – carcasses and all – as opposed to replacing door fronts or just the bench top, you’ll be adding to the level of renovation, including the trades and materials needed, and obviously the cost. When you remove tiles you may damage the wall behind, and definitely compromise any waterproofing membrane.
Structural renovations could mean adding a window, removing a wall to open up a space, through to adding a powder room or an entire wing! Whether a wall is load-bearing or not may be the difference between a structural or non-structural renovation. Knowing the difference will usually require specialist advice.
Major structural renovations usually means demolition work which means building permits, and increasing your footprint usually means permits, architects and engineers. Plus, once the cost of your project exceeds $16,000, you must legally hire a registered builder.
Get a copy of The Reno e-Guide for comprehensive info on all things renovation
My Top 5 things to renovate to get the most bang for your buck:
1. Painting! Include doors and trims
2. Tap ware, including showerhead
3. Surfaces, including kitchen bench, vanity, and splashbacks
4. Window furnishings (curtains etc)
5. Flooring (it can get expensive, but old carpet, for example, is gross and carries all manner of bugs and filth)
My Experience: I did a full cosmetic renovation, but some of the big ticket items I didn’t do (but thought hard about) included:
Removing base cabinets and vanity – they were still in good condition
Reconfiguring sink plumbing from wall to bench top or adding a dishwasher – my place is masonry so this choice turns into a major job
Changing the flooring in the living area or bathroom –still in good condition and suited the new ‘vibe’
Changing the bath tub or converting to a walk-in shower – huge additional cost for small gains
Moving the toilet pan or updating to a more modern style – pan in good condition but unusual style (skew trap) so the cost would be very high to change
I didn’t duct the range and instead got a high quality recirculating unit with carbon filters – no roof space & venting out exterior wall would require significant brickwork
6. Where to Spend Up
The kitchen. Seriously. Usually followed by the bathroom. These two areas are the locations most people feel are the places they don’t want to compromise. Plus, they’re the spaces with the most services – water and electrics – so you’ll almost definitely need to allocate a significant chunk of your budget here.
The layout of the kitchen must be practical, and depending on the era of the original build, it just may not work for a modern household. You’ll probably want more storage and new appliances. Extra lighting. A fairly modest kitchen reno in a smaller space can easily cost $30k alone, even without custom cabinetry.
Bathrooms are becoming more lux. If you have a combined toilet/bathroom, separating them out may be called for. Bath tubs are preferred by many people if you have the space, and floor to ceiling tiles are where it’s at right now. It’ll cost a bomb!
Bathrooms also have complex trade requirements. Waterproofing is a necessary cost in a wet area that adds nothing to the appearance, plus multiple plumbing, electrical, HVAC etc.
That’s not to say there aren’t savings to be made. Flatpack kitchens are a great option. Get end of run/last season tiles from a distributor. Go to bargain appliance outlets selling items with minor scratches and dents. But don’t scrimp on trades/labour – the risks of failure (flood, fire) are enormous.
My Experience: The Kitchen cost just under half the total spend of my renovation. ‘Throughout’ (ie: multiple rooms) approx a quarter of the total, the Bedroom about 10%, and the Bathroom surprisingly only about 8%. I saved money by basically employing all the tips in this article, and by avoiding having to employ contractors to do a lot of the work. It meant compromises and hard choices, but that’s what smart renovating is all about!
7. When to D-I-Y versus Using Trades
Other people’s labour is by far the biggest cost. If you hire contractors to do your renovation, this will easily double your costs. In fact, one way to estimate a budget is to research material costs, double it (for labour), and add a 20% buffer.
One of the main reasons my renovation was so cheap is because I did almost all of it myself (by keeping it simple and negating the need for qualified trades). This equated to a little over 900 hours including project management, research, sourcing and labour over about a year. Not everyone has that much time to devote to a renovation!
Ask yourself, can you do a good enough job that you’ll be satisfied with the result? Possibly, but maybe not, right? Apart from the time spent doing the thing (and possibly fixing the thing!), you also need to learn to do the thing. It’s a steep learning curve and you’ll get things wrong. BUT, it is an investment in yourself, and nobody can ever take away the skills and experience you gained along the way. Not to mention your increase in self-confidence!
Of course, you absolutely cannot do electrical or plumbing work yourself. Definitely leave that to the experts and get your compliance certificates. Waterproofing isn’t a licensed trade, but it’s so critical I’d also suggest not D-I-Ying that. Do not do any structural work yourself.
Want to start your own D-I-Y journey? Download the Getting Started e-Guide
My Experience: I did mostly D-I-Y. Trades included 1. Electrician 2. Plasterer for one ceiling 3. Plumber (only needed because I had an issue with external isolation valve), 4. Glazier, 5. Carpet installer. Plus I got help from two carpenter friends for skirting and bench top installation. The cost to hire trades was approx 5% of my total spend, or $2500, not including favours from those tradie mates. I also did a certificate in Building & Construction, and started a pre-apprenticeship in carpentry, woodworking and other classes, so I really invested in my own education, and used it to launch a handywoman business.
8. Don’t forget to budget for….
Contingencies – things are going to go wrong. You’ll definitely have a reno surprise (unseen/hidden things someone did in the past that affect how to tackle it going forward). Maybe you’ll uncover asbestos. Keep 10% of the total budget (as a minimum) in the kitty for this stuff.
Rubbish removal – if you’re putting new stuff in, you’ll almost definitely be taking stuff out. Council rarely allows you to dispose of construction waste through hard waste collections, and some stuff (like paint) requires specialist disposal. Allow budget for a skip ($500+), or find out where and how much it costs to take stuff to the tip. Just beware that they’ll charge extra or outright forbid many items – not just the obvious ones like asbestos.
Splurge funds - Maybe you decide to splurge on the claw foot bath. Instead of breaking the bank, keep some money aside from your budget for great finds you decide later you absolutely must have. Planning for it in advance ensures you can afford it. It’s easy to think it’s a small amount in the grand scheme of things when you’re in spending mode, but you’ll be surprised how quickly $100 here and $300 there adds up. Suddenly you’re $10k over budget and still have to pay your trades!
My Experience: I spent only $210 on taking rubbish to the tip in the end (I made sure the plasterer and carpet layer included waste disposal in their quotes). I had a 20% contingency budget, but in fact I didn’t really have anything major crop up. My isolation valve for water to flow into the unit broke, so I had to pay about $500 for plumbers to sort it out.
You don’t have to spend a fortune to get a good result, but one of the key ways to stick to budget is to use your time, know-how, and skills to get the job done. For some people their time IS money, so finding reliable, reasonably priced, quality contractors will be critical. Just expect to pay handsomely for them!
Want more? Join Bang! Club for access to many more resources, plus a supportive community to tap in to & ask your questions

